Login/Change password/register for an account/Mijn Menu
Before we start connecting and integrating Wise, we will create the Joomla portion of the login/authentication process. By doing so, when you work with OCLC to connect your Acceptance or TEST Wise instance to your J4 site, you'll be ready to test it.
User Options and Joomla Menu Items
- In Users > Manage > Options, these are the settings you want to have.

- Go to Menus > Manage and click the 'New' button in the Top Toolbar.
- Enter the Title of the menu as "Wise Menu".
- Enter the Unique Name as "wise-menu".
- Enter a Description is desired.

- Click 'Save & Close' in the Top Toolbar.
- Create two (2) new Menu Items in the Wise Menu (unless you already have them created in a different menu):
- Users > Login Menu Item Type
- Users > Logout Menu Item Type
Note: You can use the redirect on login in the Options tab to redirect to Mijn Menu by adding the Internal URL as https://yourdomain.nl/catalogus?event=invent which will take the patron to 'Wat heb ik thuis' upon login.
Add Modules for your patrons to Login/Register/Sign up for a Card and to get to My Account/Logout
This section is optional. You can do it a different way if you choose to. The following is just one way to do it.
NOTE: You will need to install and enable a third-party extension called Sorcerer in order to use this method. The free version is sufficient. https://extensions.joomla.org/extension/sourcerer/.
Login and Sign up for a Card Module
- Go to Extensions > Modules and click 'New' from the Top Toolbar (or click 'Modules' + from the Home Dashboard)
- Select 'Custom'.
- Enter a title that you will understand. Set Title to 'No'.
- Set the module Position and the Status to 'Published'.
- In the Access drop-down, select the Access Level of 'Guest'.
- In the main content area, add the following code, taking care to change the href URL to the alias you created in your Login Menu Item in the previous section:
<p><a href="/my-account" class="simple-login-link">Login to My Account</a> | <a href="_BX_SUBS_MEMBER_">Get a Card</a></p>
- In the 'Menu Assignment' tab, choose the 'Module Assignment' to display On all pages.

- Click 'Save' in the Top Toolbar.
- Refresh on the frontend and you should see a module similar to this:

The Login to My Account text should take you to the Joomla Login page. 'Get a Card' (or whatever you might change the text to say) will not work until Wise is connected. - If happy with your module, click 'Save & New' from the Top Toolbar.
- Enter a Title that you will understand. Set Title to 'No'.
- Set the module Position the same as the Login Module and set the Status to 'Published'.
- In the Access drop-down, select the Access Level of 'Registered'.
- In the main content area, we will use the Sorcerer extension and two hrefs. Sorcerer is meant to work with your content editor to add bits of code into Joomla content areas. Here is the code, but may need to toggle back to the editor to use the Sorcerer snippet to get the PHP to pull the User Name from the Joomla User. Also take care to change the logout link to the alias you created in the Logout Menu Item created previously.
<p>{source}<?php echo $user->name; ?>{/source} | <a href="_BX_APPS_MYACCOUNT_">My Account</a> | <a href="/logout">Logout</a></p>

- Set the Menu Assignment to display on all pages.
- Click 'Save' in the Top Toolbar.
- On the frontend, you can login with your Joomla user and see a module similar to this:

The Logout link should log you out. My Account will not work until Wise is connected. - If happy with your module, click 'Save & Close' from the Top Toolbar.
The concept of these two modules is that one displays to Guests. It disappears when a patron logs in and the module for the Registered user (Wise Patron in this case) then displays. In the Login module, the class "simple-login-link" will perform some magic when patrons login via the catalog or via an email to change their password. More on this after we connect Wise.
Wise Specifics for the Joomla Login Page
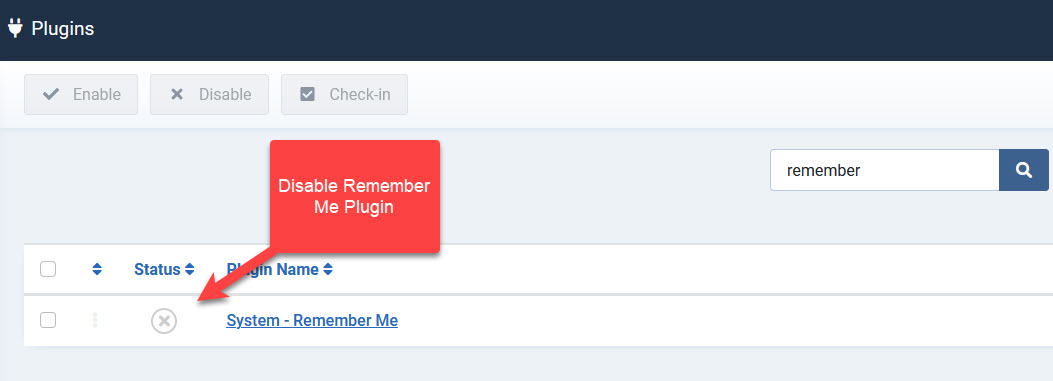
Disable Remember Me
- From the Home Dashboard, go to Extensions > Plugins (or click the 'Plugins' button from the Dashboard).
- Search for the 'Remember Me' Plugin.
- Disable the 'Remember Me' Plugin.
Why? Because we periodically remove Joomla users anyways and there's no way this can function properly. Best to not confuse the patrons.
Add a Module for Forgot Username/Password and other Wise Details
- From the Home Dashboard, go to Extensions > Site Modules > New button (or click on 'Site Modules +') and create a new Custom Module.
- Give your Module a Title you understand and set the Title to 'Hide'.
- In the Menu Assignement tab, choose 'Only' on the selected pages from the drop-down.
- Select your Login Menu Item previously created.
- Back on the Module tab, enter the information you see on the page of your Wise instance when you login via the cgi-bin/bx.pl pages. An example of this page can be seen at https://wisetest.wise.oclc.org/cgi-bin/bx.pl?event=invent. Substitute the content in your own Wise instance in the domain name, you'll see what should be included. Here's what I have in mine:
<p><a href="catalog?event=wwmailform">Forgot username or password?</a></p>
<p class="alert alert-info"><a href="_BX_SUBS_MEMBER_">Sign up</a></p>
<p class="alert alert-info"><a href="_BX_SUBS_NEWSLETTER_">Sign up for newsletter</a></p>
<p class="alert alert-info">Note: Due to security considerations, after too many failed login attempts, access to your account is blocked for one day.</p>
Notes:
- You should be able to use the same catalog?event=wwmailform as I did, though it may be catalogus.
- You may not have the same alert classes I do. You may need to find your own alert classes for your template. - Choose a Position for your Module. I created one that is below the main content area. You may not have a module position in that position and may need to create one.
- Save and then refresh the frontend.
- Make any adjustments required on the backend and then click 'Save & Close' from the Top Toolbar.
- Remove the Joomla "Forgot username" and "Forgot password" links from the Login page with CSS. The code I used in the custom CSS file to block these lines in Gantry 5 are:
/* Remove Joomla Core un/pw Reset Links */
.com-users-login__form + div {
display: none;
}
These may be different in your template.
Your Login page will now look something like the following image:

The links will not work until your site is connected to Wise.