Joomla Wisecat+ extension
Date extension package released: pkg_oclcwise 5.0.0 February 2024
Compatible Joomla Versions: Joomla 4 (until 14 October 2025) and Joomla 5 (in J5, does not require the backward compatibility plugin)
Compatible Wisecat+ Version: Wisecat+ 7.0.7 and up
The extension package is called pkg_oclcwise and consists of:
- Component
- Authentication plugin
- System plugin
- Login module
- Searchbar module
- Bookcarousel module
- the Package itself
The new Wisecat+ Joomla extension can be installed with the old Wise Joomla extension installed, but they cannot work at the same time. You can contact OCLC by opening a Zendesk ticket to receive the extension package. We will send it to you. If you are migrating from the old Wise Joomla extension to the new Wisecat+ Joomla extension, please see the migration instructions to supplement the following instructions.
Installation
Requirements:
- Joomla core SEF URLs must be enabled.
- PHP extension allow_url_fopen must be enabled on the Joomla server.
Quick steps:
- Navigate to System → Install → Extensions
- Install the pkg_oclcwise extension via Browse or Drag and Drop
- Navigate to System → Plugins and search for OCLC Wise System Plugin.
- Enable the OCLC Wise System Plugin.
- Navigate to Components → OCLC Wise and enter the General, Keycloak settings, and Additional tabs.1
- Add cron job.
- Create Menu Item for Wise.
- Add .htaccess rules for menu item and redirects from patron email links.
- Navigate to Components → OCLC Wise and configure the Modules tab.
- Create Login, Searchbar, and Bookcarousel Modules.
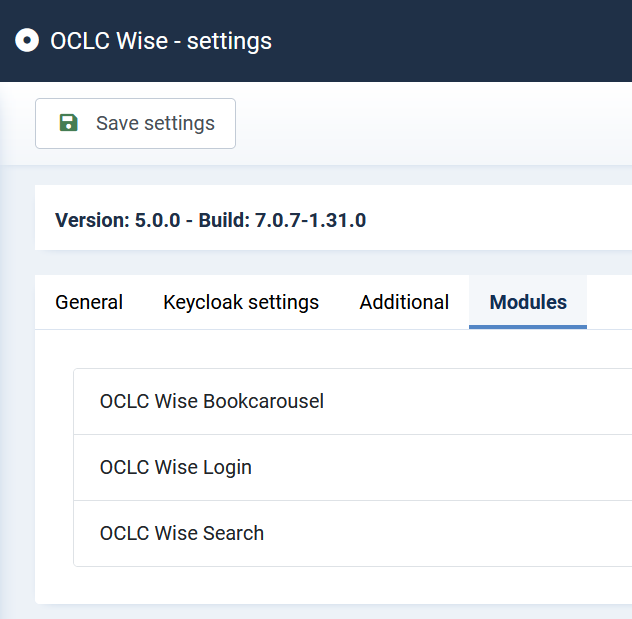
Component Overview
The main screen in the Component (Components → OCLC Wise) shows the Wisecat+ Joomla extension version number and the Wisecat+ build number. The Top Toolbar consists of three buttons:
- Save settings: Saves the settings for all tabs of the component.
- Logs: If logs are enabled on the Additional tab, the logs can be viewed by clicking the Logs button. Details in the Additional Tab section.
- Replace media files: Used to replace the Wise media files from the Wise environment. Details in the Additional Tab section.

The Wisecat+ build collects updates from Wise. The build is detected and added to the Joomla site by a cron job set up on the Joomla server. The cron job should be set to run every three hours daily. Details in the Additional Tab section.
General Tab
The General tab of the Component is where the Wise settings are entered. They are:
- Wise server domain (include https://)
- Branch number/ID
- Library ID/Library Organisation/Instantie
These can be found in the Wise Manager.

Make sure to click the Save Settings button in the Top Toolbar.
Keycloak Settings Tab
The Keycloak settings tab of the Component is where the Keycloak settings are entered. They are:
- Keycloak domain (include https://)
- Realm name
- Client ID
- Client secret key
IMPORTANT: You will be provided two different Client IDs. One for "local" use which will allow patrons to login with their Wisecat+ patron accounts. The other for "external" use which will allow patrons to login with their KB patron account. When the Wise Manager System Option "NLKBLOG" is enabled, the EXTERNAL Client ID must be entered into the Client ID field of the Component in the Keycloak settings tab.
These will be provided for you by OCLC. Ask us for them if you haven't received them.

Make sure to click the Save Settings button in the Top Toolbar.
Additional Tab
The Additional tab of the Component is where you set a number of seemingly random settings. Let's go through them:
- Field label: H1 tag (hidden): This field is to define an H1 tag for your catalog and Mijn Menu pages without detracting from the page layout. Because the Wisecat+ headings are H2, h2, etc., this is how we can have an H1 on the Wise pages for SEO and accessibility. By default, the field will state your Site Name from Joomla Global Configuration followed by catalog. You may replace that default with your choice of text in this field.
- Debug level: leave at minimal logging unless instructed by OCLC or Zoccolo staff.
- Delete users: Setting to 'Yes' is recommended for privacy. If you choose to set this to 'No', you should delete patron Joomla accounts (Users → Manage → Filter registered users → delete) regularly.
- Cron password: Set your cron password here. You will then see the Cron job url posted below. This is what you will use for your cron job on the Joomla server.
- Set your cron password. The cron password cannot contain characters or spaces. The cron password can only contain numbers or lowercase letters. Click the Save settings button in the Top Toolbar.
- Go to your Joomla server cPanel or Plesk control panel (or however you set up cron jobs on your server).
-
Set up the server to hit/trigger the URL shown below the cron password field every three hours every day. This will collect the Wisecat+ updates and bring them to the Joomla site. Since each server is different, we cannot provide an exact cronjob. This is an example:
https://domain dot com /index.php?option=com_oclcwise&task=cron.getlatestbuild&pass=123curl -s"domain/url" - If you begin to notice that the build number in Components → OCLC Wise isn't changing very regularly, do check your cron job. Sometimes servers change and cron jobs stop working.
- The build number in the Component settings will match what Wisecat+ is running if the cron job is working properly.
- If the Joomla site isn't receiving the updates from Wisecat+, your catalog and mijn menu may not behave properly. For example, if after a Wise upgrade, you see missing language strings or other odd behavior, please re-run the cron job. If that doesn't resolve the issue, you may need to replace the Wise media files. To do so, click the Replace media files button in the Top Toolbar. On the next cron run, all the files will be replaced. Alternatively, you can re-run the cron job manually (by copying the cron job URL into a different browser tab). It will take 3-7 minutes for the cron to run and load all the new Wise media files. Do not close the browser until this is completed. You will see the word 'done' in the browser when complete. You may need to clear your cache in order to see the changes on the frontend. The catalog will continue functioning when using the Replace media files functionality.
The integration will not work without running the cron job. Run the cron job now by copying the cron job URL at the bottom of the Additional tab, opening a new tab, pasting the URL into the address bar, and pressing enter in order the get the latest build from Wisecat+ as you go forth with your configuration.
- Log activity: Leave set to NO by default. Only enable if OCLC staff instructs you to do so. Setting this option to Yes, will create a log of some information for troubleshooting. Logs can be accessed by clicking on the Logs button in the Top Toolbar. Logs are kept for 7 days only, then they are automatically deleted. Please remember to turn Logging to NO when done using them.
- Log IP numbers only: If Logs are enabled, a field to log specific IP addresses is displayed. This way, you can collect logging for only the IP address you want to troubleshoot. This is helpful in large systems that might have large quantities of logs. Enter one IP address per line or separate by a comma.
Make sure to click the Save Settings button in the Top Toolbar.

Wise Menu Item
After configuring the OCLC Wise Component settings in the General, Keycloak settings, and Additional tab, it's time to create a Wise Menu Item so that the functionality of Wise can display on the site. The Wise Menu item can be added in any of your Joomla Menus. It can be in the Main Menu (hidden or not) or a "Hidden Menu". We'll use the Hidden Menu for our example. You can have multiple Wise Menu Items for various purposes, but there must be one main Wise Menu Item with the alias 'wise-apps' in order to function as designed.
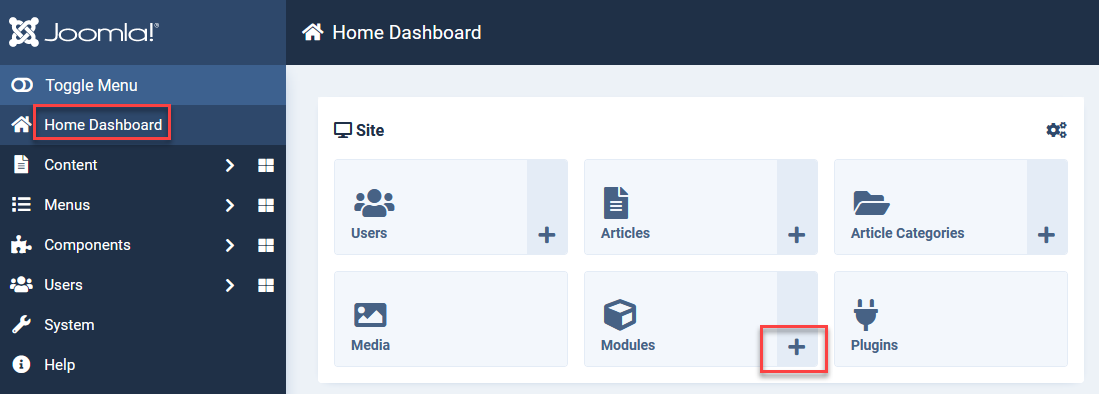
- From the Home Dashboard, click Menus and then the + sign next to the Hidden Menu.

- Enter the Title Wise Apps
- The Alias must be wise-apps for at least one of your Wise menu items.
- Click the Select button in the Menu Item Type field.

- Click OCLC Wise from the accordion of options, then click Wise angular page.

- You will see that the Page type field has filled in with the Default page. This is what we want. How to use other page types is described further in the Wise Shortcodes for Joomla section of the documentation.
- If you are creating the Wise Apps menu item in your main menu, but don't want it to display, click on the Link Type tab and toggle to No for the Display in Menu setting.

- Click Save & Close in the Top Toolbar.
This sets up the Menu Item required for Wise functionality. Now we need a .htaccess rule so everything goes where it needs to go.
.htaccess Rewrite Rules
.htaccess Rules for Menu Item
Add Wisecat+ related Rewrite Rules in .htaccess. They should be added between ## Begin - Custom redirects and ## End - Custom redirects of the Joomla .htaccess file.
RewriteCond %{REQUEST_URI} ^/wise-apps/opac
RewriteCond %{REQUEST_FILENAME} !-f
RewriteRule ^wise-apps/opac/(.*)$ /media/com_oclcwise/wise-apps/opac/$1 [NC,L]
.htaccess Rules for Patron Email links
VARIABLES:
'/catalog' - can also be something like: '/catalogus' or '/mijn-menu' etc.
'BRANCHID' - replace with the branchid which is configured in the extension for example (four digit number).

RewriteCond %{REQUEST_URI} ^/catalog$
RewriteCond %{QUERY_STRING} event=profset
RewriteRule .* /wise-apps/opac/BRANCHID/new-arrivals [L,R,QSD]

RewriteCond %{REQUEST_URI} ^/catalog$
RewriteCond %{QUERY_STRING} event=mailabbo
RewriteRule .* /wise-apps/opac/BRANCHID/my-account/notification-preferences/areas-of-interest [L,R,QSD]

RewriteCond %{REQUEST_URI} ^/catalog$
RewriteCond %{QUERY_STRING} event=invent
RewriteRule .* /wise-apps/opac/BRANCHID/my-account/checkouts [L,R,QSD]

RewriteCond %{REQUEST_URI} ^/catalog$
RewriteCond %{QUERY_STRING} event=private
RewriteRule .* /wise-apps/opac/BRANCHID/my-account [L,R,QSD]

RewriteCond %{REQUEST_URI} ^/catalog$
RewriteCond %{QUERY_STRING} event=tickw_uitvsel
RewriteCond %{QUERY_STRING} ^(.*)u_id=(.*)
RewriteRule .* /wise-apps/opac/BRANCHID/tickets/performance/%2 [L,R,QSD]

RewriteCond %{REQUEST_URI} ^/wise-apps/catalog/(.*)/detail/wise/(.*)
RewriteRule .* /wise-apps/opac/BRANCHID/catalog/title-detail/WISE/%2 [L,R,QSD]
Now we can return to Components → OCLC Wise → Module tab and continue with our configuration.
Component Modules Tab
The Modules tab of the Component (Components → OCLC Wise → Modules tab) is where you can set the global settings for the Searchbar, Bookcarousel, and Login modules. For each of these, you may set the global parameters in the OCLC Wise Component Global Settings. Then, if you want to change one or more individual Site Modules, you can do so through the module itself (Systems → Modules). We recommend setting up the global settings for the Bookcarousel in particular. This makes it much easier to manage large quantities of bookcarousel modules in the future. In the individual Site Modules for Bookcarousel, Login, and Search there are options to "Use Global" which pull from these global settings in the Component. By selecting "Use global" in the individual Site Modules, you save time if one change needs to happen in multiple Site Modules. As long as "Use global" is selected, you only have to change the settings in the Component Modules tab global settings. Descriptions for each module follow.
OCLC Wise Search Module
In the Component Modules Tab, click the accordion to access the global search settings for the OCLC Wise Search module.

- Placeholder: Choose the Placeholder text that is seen in the searchbar input field (where people type their search terms). Most common is Catalog Search, Search the Catalog, Typ hier uw zoekopdracht in..., etc.
- Scopes: Select the scopes that match the scopes configured in your Wise Manager. By default, All, Title, Author, and Subject are selected. You can select them all, but they will only work if the scopes are configured in your Wise Manager.
- Enable website search: Select Yes in order to use Joomla core Smart Search from your searchbar. You must have Smart Search enabled and indexed. You must have a Smart Search menu item created though it can be hidden. Then, when people select Website from the search drop-down on the frontend and enter a search query, they will receive search results from your website content.
- Add other search options: Click the plus button to add a search to anywhere you'd like. This might be an external Events platform. It might be a Joomla events component search like RSEvents, etc.
- Label: Add a label for the search. This should be as short a word as possible like Google, Events, Genealogy, etc.
- URL: This should be the domain and URL to pass the search term to the source.
- Open in a new tab: Select Yes/No. Best practice is that if you are sending someone off your website, open in a new tab. If it's on your website, do not open in a new tab.
Make sure to click the Save Settings button in the Top Toolbar.
Once complete, go to Site Modules (via the Home Dashboard, Content → Site Modules, or System → Manage → Site Modules) and click the + New button. Select OCLC Wise Search.

- Enter a title for your searchbar module.
- Set the title to show or hide (probably hide).
- Select a module position for your searchbar to display.
- In the Menu Assignment tab, select the menu items you'd like the module to display on.
- If you used the Component Global Settings, click Save and check out your searchbar on the frontend.
- If you did not use the Component Global Settings or want to make changes on individual modules, tick each of the boxes that say 'Use global' so that they don't use global and enter your desired settings. Then click Save and check out your searchbar on the frontend.
On the frontend, you will see the scopes in the drop-down followed by Website search (if enabled) and then other search options.

If the Dutch language pack is installed and set as default for the Site, the module will display in Dutch.
OCLC Wise Login/My Account Module
In the Component Modules Tab, click the accordion to access the global search settings for the OCLC Wise Login module. Most likely you will only have one of these modules on your site. If you'd rather do these settings in the individual Site Module itself, navigate to System → Site Modules. Create a new OCLC Wise Login module and follow the same directions as below.
- Click here for an image of the Login module
-

There are two sections of the login module. One displays when users are Logged out, the other when users are Logged in.
Logged out
For context, this is how it looks when the user is logged out:

Login button label: Type your desired login text into this field (inloggen, login, etc.)
Login button class: You may use a button class if you'd like.
Show signup link: Select Yes or No to display a link to allow users to sign up for a membership.
Signup link text: Type your desired sign up text into this field (lid worden, get a card, sign up, etc.)
Signup link class: You may use a button class if you'd like.
Ordering: You may select the order you'd like the links or buttons to appear. The options are:
- Login - Signup: The login label displays first, followed by the signup label/text.
- Signup - Login: The signup label/text displays first, followed by the login label.
Separator: If you'd like to add a separator, you may do so in this field. For example | or other characters.
Logged in
For context, this is how it looks when the user is logged in:

- Logout button label: Type your desired logout text into this field (uitloggen, logout, etc.)
- Logout button class: You may use a button class if you'd like.
- Show my account link: Select Yes to show a link to My Account/Mijn Menu or No if you choose not to display a link to My Account/Mijn Menu.
- My account link text: If you selected Yes for Show my account link, type the desired text into this field (my account, mijn menu, etc.)
- My account link class: You may use a button class if you'd like.
- Show username: Select Yes to show the user's username, or No for the username not to display.
The next two parameters specify how to display the name during new patron/actor registration. When the patron signs up for a new membership online, the Sign up/Lid Worden link will take them to Keycloak to fill out a small form. After successful submission in Keycloak, they'll return to Joomla and after a forced reload, complete the Wisecat+ portion of the registration. The following two parameters specify what the new patron will see on return from Keycloak. The patron will see this "unknown" username (if chosen to display) until they logout or are timed out. The next time they login, their own name will display (if Show username in the parameter above is set to Yes.
- Show unknown username: Yes/No. If Yes is selected, the default of the Unknown username field (next option down) will display). If No is selected, no username will display on the frontend. Only Mijn Menu and Uitloggen will display. The image below shows No unknown username:

- Unknown username: Default is 'unknown username' in English and 'onbekende gebruiker' in Dutch. Enter what you'd like patrons to see instead of the default in this field. It could be 'Hello!' or 'New patron'. Whatever you wish. The image below shows 'Hallo!' in the Unknown username text field parameter:

- Username prefix: Enter your desired text for a username prefix or greeting (hello, hallo, hi, hoi, greetings, groeten, etc.)
- Separator: If you'd like to add a separator, you may do so in this field. For example | or other characters.
- Ordering: You may select the order you'd like the links or buttons to appear. The options are:
- Username - My account - Logout
- Username - Logout - My account
- My account - Logout - Username
- My account - Username - Logout
- Logout - My account - Username
- Logout - Username - My account
When finished, make sure to click Save settings in the Top Toolbar.
Create a Login Site module
If you haven't already, create a new OCLC Wise Login Site Module.
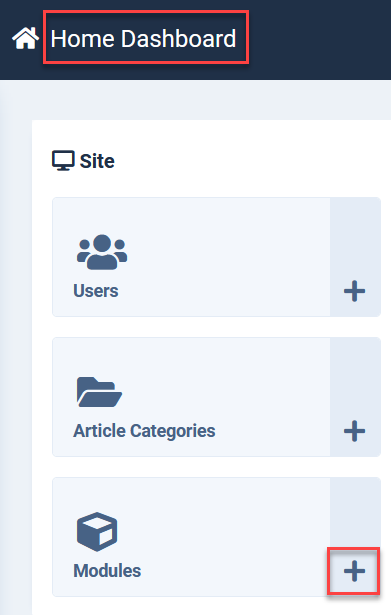
- From the Home Dashboard, click the Modules + button.
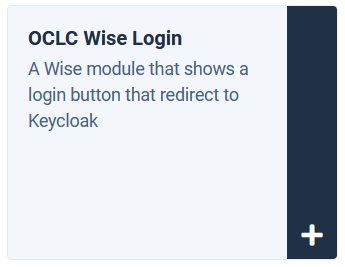
- Select OCLC Wise Login
- Enter the Title of your module.
- Set the Title to Show or Hide based on your preference.
- Choose a Position towards the top of your website - or wherever you would like.
- Click the Menu Assignment tab and set to whatever pages you would like the module to display.
- If you have already configured the global settings in the OCLC Wise Component, click Save & Close. Then check the module on the frontend. Make adjustments in the component.
- If you haven't configured the global settings in the OCLC Wise Component, do so in the Site Module following the directions above. Click Save & Close. Check the module on the frontend. Make adjustments in the Site Module until you are happy.

OCLC Wise Bookcarousel Module
In the Component Modules Tab, click the accordion to access the global search settings for the OCLC Wise Bookcarousel module. This is where you will set up how you want the global settings for your bookcarousels. Before we begin, you must create bookcarousels in the Wise Manager. See documentation on creating Wise Bookcarousels. Once you have at least one bookcarousel created in the Wise Manager, we can begin setting them up in Joomla.
Since it will be challenging to know how you want to set up the bookcarousel without being able to see one, we will leave the defaults in place in the OCLC Wise Bookcarousel global settings and first create an individual Site Module to display on the frontend. Click the Save settings button in the Top Toolbar of the Component if you have made any changes you want to keep.
- From the Joomla Home Dashboard, click the + sign in the Modules button.
- Select OCLC Wise Bookcarousel from the list of installed modules.

- Enter the Title, Infopoint Profile ID (from the Wise profiel in the Wise Manager), Show the title (for now), select the module Position in your template, and select the Menu Assignment so that the module displays on a page or pages of your choice. Tip: Adding the infopoint profiel number to the 'Note' field of the module helps you find it more easily when there are large numbers of bookcarousel modules on a site.


- Click Save & Close.
Now we will have something to look at on the frontend of the site as we enter the settings of the bookcarousels in the OCLC Wise Global Settings.
Click on Components → OCLC Wise → Modules tab → OCLC Wise Bookcarousel
- Click for an image of the Bookcarousel settings page
-

- Infopoint Profile: Do not use this field in the Global Settings. You will fill in the Infopoint Profile number in your individual modules (since they will all be different).
- Number of items: Enter the number of book covers you'd like to display in your carousel. This is largely dictated by Wise. However, if the Wise Regal and Planken are set to 100+ and you only want 50 to display on the website, you may enter 50 in this field. Leaving the default of '0' will allow Wise to decide the number based on what is configured in the infopoint profile.
- Show title: If you would like to display the title below the book covers, toggle to Yes.
- Show author: If you would like to display the author below the book covers, toggle to Yes.
- Navigation class: You may create custom classes for navigating the bookcarousels. If you have a custom navigation class, you may enter it in this field.
- Navigation item class: You may create custom classes for navigating the list items. If you have a custom navigation item class, you may enter it in this field.
- Navigation link class: You may create custom classes for navigating the link items. If you have a custom navigation link class, you may enter it in this field.
- Hide title on 1 tab: Choose Yes or No to hide the title of the tab on bookcarousels with one tab. This is your preference. Many prefer to use the Module Title rather than the title that shows up in the tab that comes from Wise on bookcarousels with only one tab.
- Height in px (max): Enter the height of the cover images in the carousel. Width is considered in the aspect ratio. 200px is lovely.
- Speed (ms): Enter the speed in milliseconds of the shifting of the covers.
- Autoplay (ms): Enter the speed in milliseconds if you would like the covers to autoplay. If you do not wish the covers to autoplay, set this field to 0.
- Autostop on interaction: If autoplay is enabled, hovering or interacting with the carousel will stop it from autoplaying. Select Yes or No for this option.
- Show pagination: Pagination are the bullets below the bookcovers, titles, and author. Select Yes or No to show pagination below the bookcarousels.
- Pagination clickable: Select Yes or No for the bullets to be clickable or not.
- Pagination type: Choose from the drop-down one of three options:
- Bullets (dots)
- Fraction (1 of 6 1/6, etc.)
- Progressbar
- Show next/previous buttons: Next/Previous buttons are the arrows to the left and right of the bookcarousels that visitors can click to forward or reverse to the next group of items.
- Button position: Choose whether you'd like the next/previous buttons to display Inside the slider or Outside the slider.
- Covers per slide: Choose how many covers should display in each slide. 7 works well on a full width bookcarousel.
- Covers per group: When pagination or next/previous buttons are clicked, this is the number of covers that will advance forward or backwards. It's nice to have the covers per group match the covers per slide setting. That way, none of the covers are duplicated as the visitor scrolls through.
- Center active cover: Setting this to Yes will make the first cover "centered" in the carousel. Setting this to No looks better.
- Keyboard control: This allows the visitor to use the keyboard to control the carousel. Setting this to Yes is recommended.
Small Screen Settings
- Breakpoint: set the number of pixels for the small breakpoint. For example 400. You don't have to enter "px". Enter the width you'd like for the breakpoint.
- Covers per slide: Choose how many covers should display in each slide. One works well on a small screen.
- Covers per group: When pagination or next/previous buttons are clicked, this is the number of covers that will advance forward or backwards. It's nice to have the covers per group match the covers per slide setting. That way, none of the covers are duplicated as the visitor scrolls through.
Medium Screen Settings
- Breakpoint: set the number of pixels for the medium breakpoint in pixels. For example 768.
- Covers per slide: Choose how many covers should display in each slide. Four works well on a medium screen.
- Covers per group: When pagination or next/previous buttons are clicked, this is the number of covers that will advance forward or backwards. It's nice to have the covers per group match the covers per slide setting. That way, none of the covers are duplicated as the visitor scrolls through.
Large Screen Settings
- Breakpoint: set the number of pixels for the large breakpoint in pixels. For example 1024.
- Covers per slide: Choose how many covers should display in each slide. Five to seven works well on a large screen.
- Covers per group: When pagination or next/previous buttons are clicked, this is the number of covers that will advance forward or backwards. It's nice to have the covers per group match the covers per slide setting. That way, none of the covers are duplicated as the visitor scrolls through.
Click Save settings button in the Top Toolbar to save your changes.
Check/refresh the frontend and see how the module you created earlier looks. Make any changes in the Component → OCLC Wise → OCLC Wise Bookcarousel global settings, save, and check the frontend. Repeat until you are happy.
The same settings that are found in the global settings of the extension are also found in the individual modules, separated into tabs for Module, Menu Assignment, Navigation, Carousel Settings, and Responsive. This way, if you have specific changes you'd like to make only one one bookcarousel module, you can. To change only one module, simply toggle the options which state "Use global" to "Don't use global". Then you can change those settings for individual modules.
For example, most modules will use a different Infopoint Profile number. In the individual module, you will toggle "Use global" to "Don't use global" and enter the infopoint profile number from the Wise Manager into this field. If you didn't want to show Title and Author in this one module, you would toggle Use global to Don't use global and leave Show title and Show author set to No.
This gives you a lot of flexibility in how you can configure and display your bookcarousel modules. Play around a little and see what works for your site.

Wise Shortcodes for Joomla
The following shortcodes can be used in Joomla to display Wisecat+ pages. They can be used in content like Articles and Modules, etc.) or in Menu Items.
The Shortcodes
| OW_ARRIVALS | New Arrivals/Aanwinsten |
| OW_CHARTS | Top Lists/Toplijsten |
| OW_RECOMMENDATIONS | Recommendations/Lees- of Luisteradvies |
| OW_TICKETS | Tickets/Kaartjes |
| OW_MY_ACCOUNT | My Account/Mijn Menu |
| OW_CATALOG | Catalog/Catalogus |
| OW_SIGNUP | Sign up/Lid Worden |
| OW_NEWSLETTER_SIGNUP | Newsletter Sign up/Abonneren op nieuwsbrief |
Use in Articles and Modules
To use shortcodes in Articles and Modules, add any of the shortcodes into your editor of choice or via HTML.
Articles and Modules

Example HTML
<a href="OW_ARRIVALS">New Arrivals/Aanwinsten</a>
Use in Menu Items
To use shortcodes in Menu Items, you may select them from the OCLC Wise Menu Item.
- Go to Menus and select the menu you'd like to use.
- Click the + button or click New in the Top Toolbar.
- Enter the Title of the Menu Item.
- Click the Select button for Menu Item Type, click on OCLC Wise, and then Wise angular page.

- Click the drop-down for Page type and select any of the shortcode options from the list. The example below shows Mijn Menu/My account.

- Click Save & Close from the Top Toolbar.
- Test on the frontend.
If there is a different shortcode you would be interested in having, please open a ticket so we can consider adding it.
Wisecat+ Styling in Joomla
Wisecat+ uses Bootstrap 5.2.x as of March 2024. For Joomla templates that also use Bootstrap, nearly all of the styling that comes from Wisecat+ looks really good. For templates that don't load Bootstrap, even then the styling is not bad. That said, there will be some styling issues which Zoccolo will need to address for you to Make Wisecat+ in Joomla look as it is intended to look. It is impossible to say exactly what will need to change in your template since every template and framework are different. Because you may need to change some classes for Wisecat+ and not for the rest of your template/Joomla styling, we have provided an ID and a class so that you can use them to be very specific about your CSS overrides for Wisecat+ styling.
| ID | #wise-integration |
| Class | .oclcwise-app |
Each of these have slightly different results. Use whichever one works best for your needs. These two selectors make things a lot easier to make CSS overrides for only the Wisecat+ styling and not affect the other sections of your site/template.
Styling for CGI Wrapped Pages
A few of the pages in Wisecat+ are CGI wrapped pages. Because these pages live on the Wise server, we are unable to override the CSS via the Joomla site. There are only a few pages where you may see either orange or blue buttons or hyperlinks. To choose between orange or blue:
- Login to the Wise Manager
- Go to systeemWise → Marketing → Thema kiezer.
- Click Nieuw in the Top Toolbar.
- Select the Instantie.
- Select the Thema of either Koninklijk oranje or Presidentieel blauw.
- Click Ok.

It will take 30-90 minutes for the change to take affect so that you can see the change in colour on your Joomla site. It may take overnight.
The rebuilding of the CGI pages is on the roadmap for after Wisecat+ has completed phase 2. Thus, choosing between oranje or blauw is a temporary limitation.
Another known limitation with the CGI wrapped pages is that they only display in the Joomla site. If you attempt to view a CGI wrapped page in Wisecat+ native, they will not display. They will only display in Joomla.
Support
If you need support, contact Zoccolo first. If Zoccolo tells you to open a Zendesk ticket with OCLC, please do so and we'll be happy to help.